Bullet Journaling For Beginners
A Step-By-Step Guide to Starting Your Bullet Journal Journey
By Sam Downey, Arts Staff Writer
Bullet journaling isn’t exactly a new idea; it rose to prominence in 2013 when creator Ryder Carroll began sharing his unique way of using notebooks with an online community. It consists of using a dotted grid journal to draw out your own custom planner with calendars, trackers and other features that match perfectly with your needs (Russel, 2019).
In the past few years, you may have seen “BuJo” enthusiasts eagerly posting beautiful journal spreads on Instagram and other social media sites and felt intimidated by the artistry involved in even the simplest to-do list. A lot of the popular images can seem more decorative than anything else, often involving elaborate collages of printed photographs and patterned tape.
Fancy trappings aside, having a custom planner can be extremely helpful. I started my bullet journal in the summer of 2020, mostly motivated by the fact that Covid-related shipping delays were limiting the options for purchasing a pre-made planner. I was also attracted by the idea of total control of each page’s layout, which allows one to draft uniquely specific homework checklists, schedules, trackers and more. You can even devote space to affirmations, grocery lists, gift ideas and anything else your heart desires.
They say that with great power comes responsibility, and likewise, with great creative freedom comes the pressure of making it aesthetically pleasing. However, drawing out a bullet journal spread doesn’t have to be a daunting task! Here’s a step-by-step glimpse into my process—no guarantee that this will work for everyone, but I’ve found it helpful to follow this template and make small variations with each new week I draw.
The Supplies
I use a black Moleskine dotted notebook—which is a bit expensive but has served me well for over a year now—and Sharpie pens (not the thin markers but the pens, specifically), which are the only fine-point markers I’ve found that don't bleed through the paper. When first starting out, it can also be helpful to use a ruler and pencil to make a sketch first.
The Layout
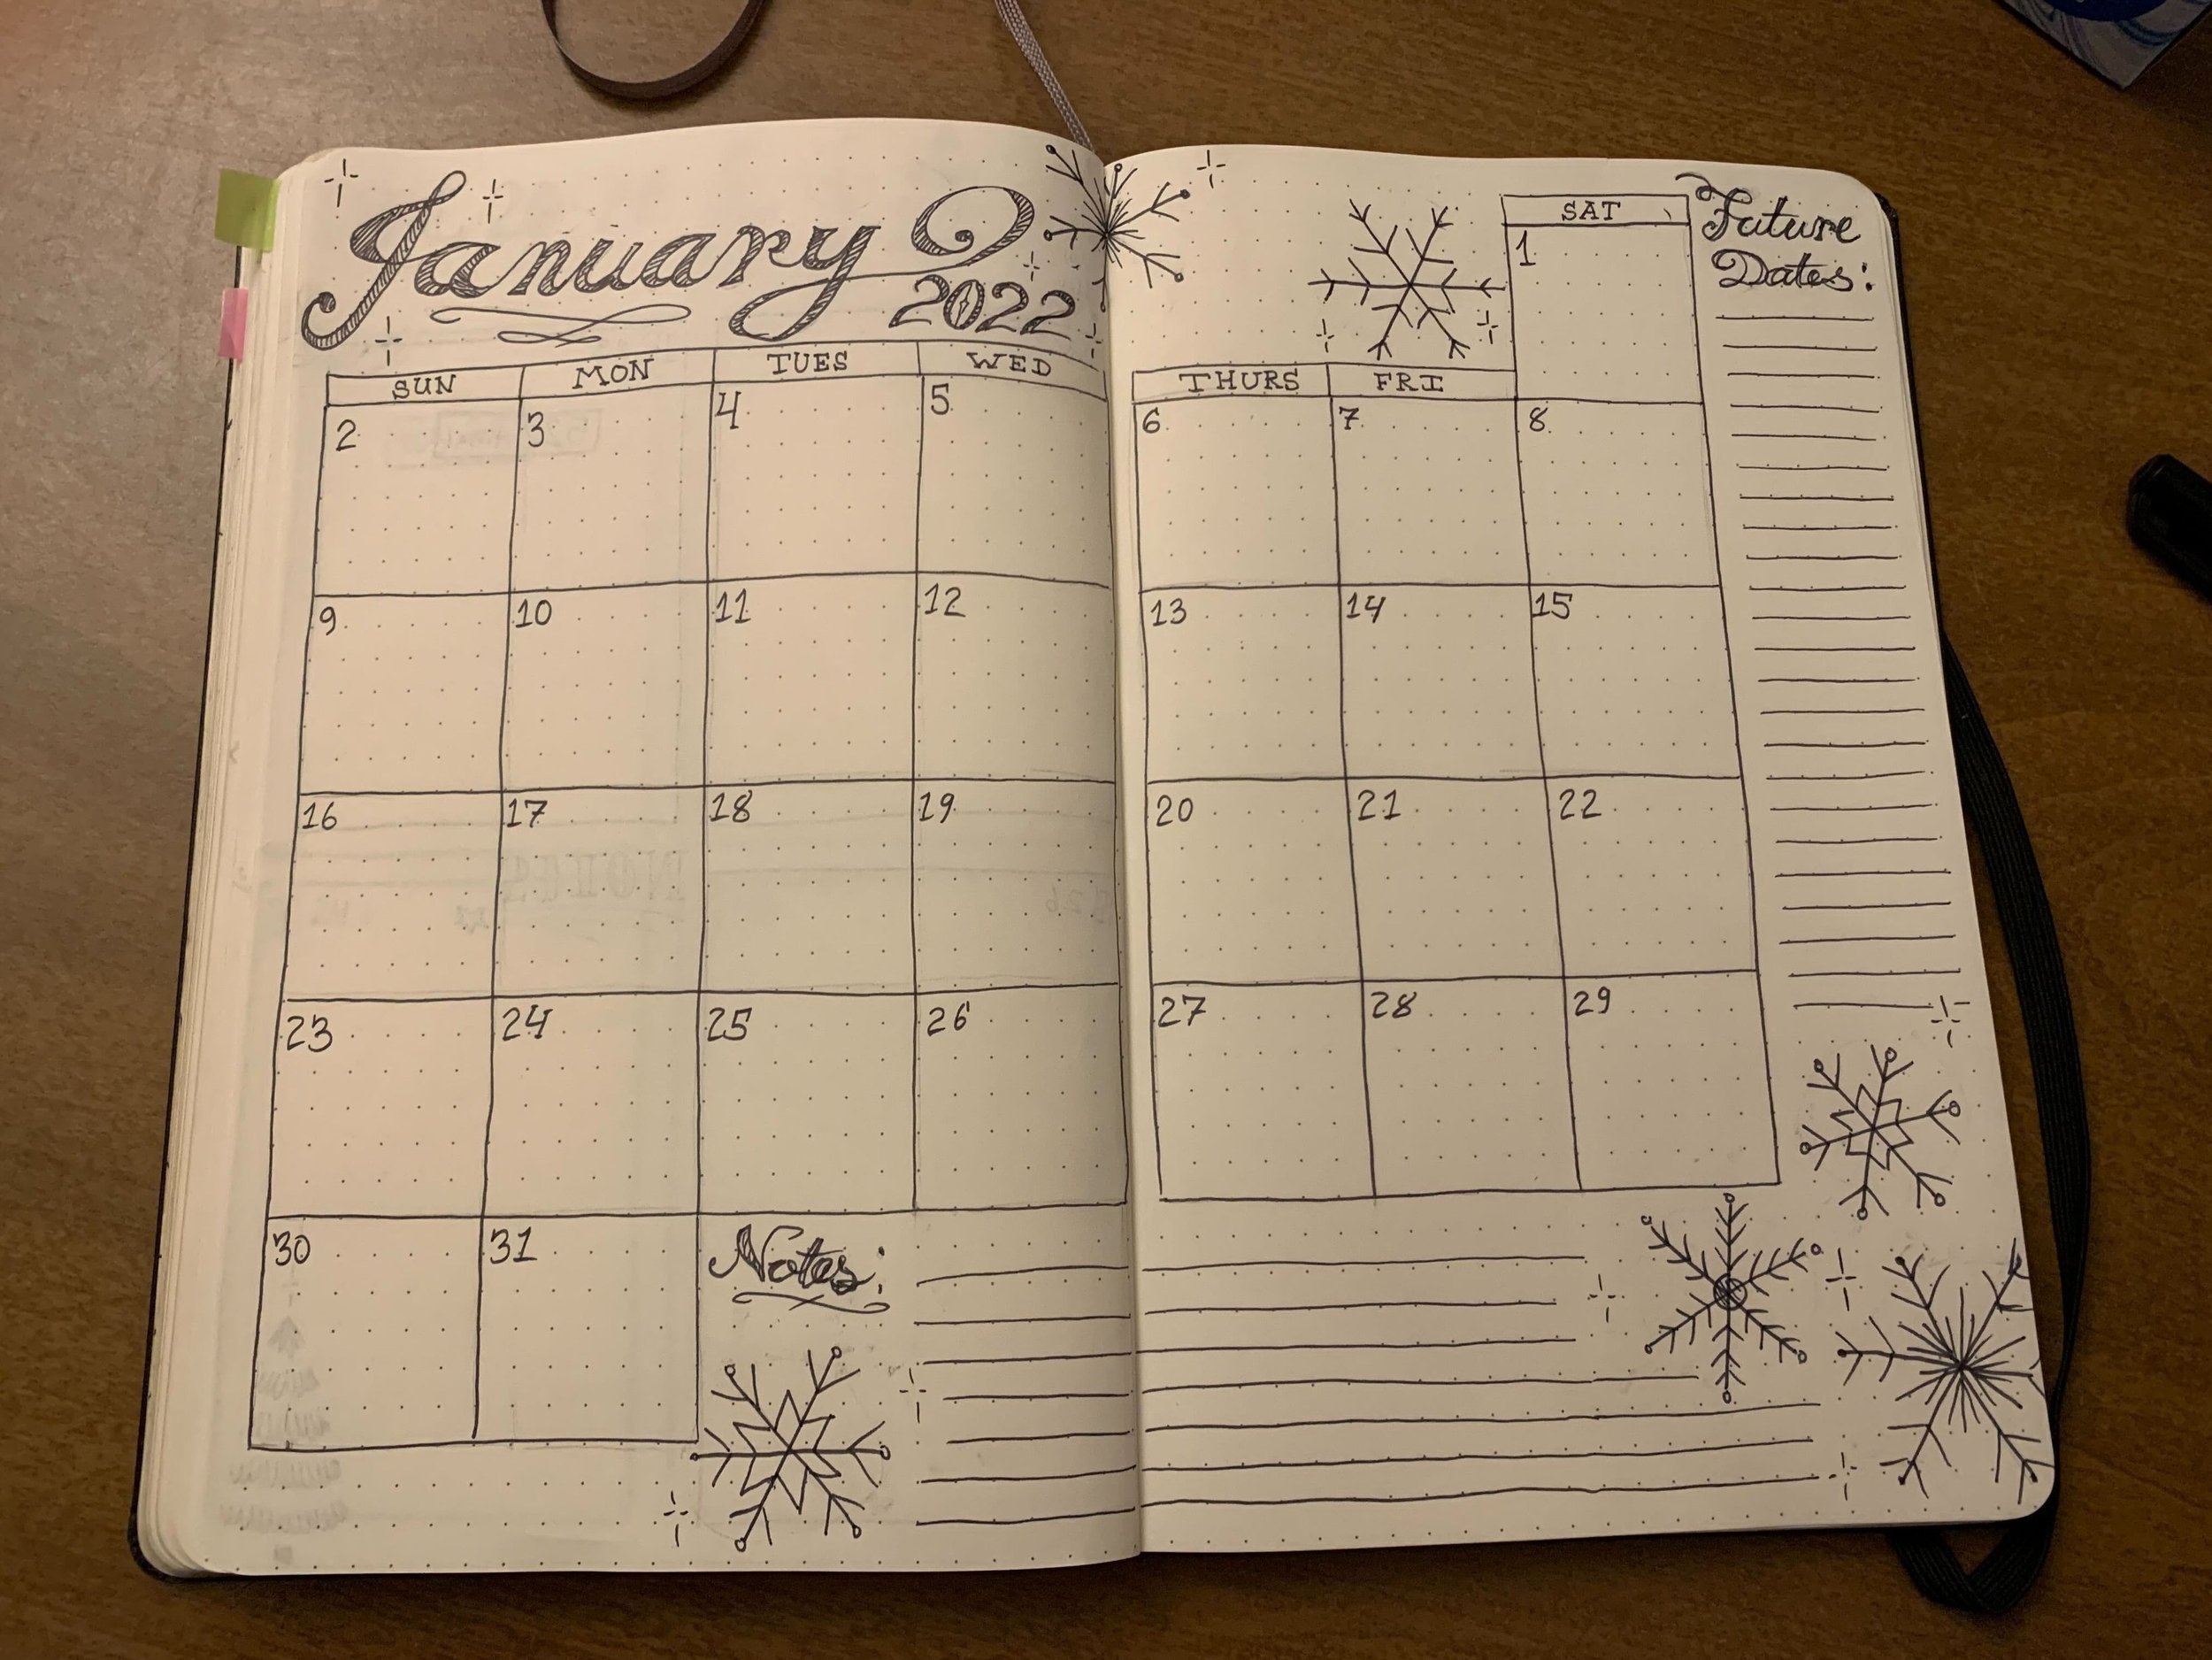
I like to start simple, giving each week a two-page spread, and drawing out an 11-dots-by-16-dots rectangle for each day. (That’s really just a guideline; I don’t count the dots each time.) I find that this gives me enough room to record my assignments and appointments for each day, even during hectic weeks.

Next, I write the span of dates at the top and label each rectangle with the date and day of the week. I also designate space for notes and reminders that aren’t attached to any particular day. You can start having fun with design on this step, but you only have to get as fancy as you want to. I like to look up cool fonts and copy the way that the letters look.

When tracing out a new full-month calendar, definitely start with a pencil, and double-check the dates as you number the squares. It can also be helpful to include a section to jot down future dates since I usually only draw about a month in advance. This way, you can keep track of things to add when you draw the next month.

Getting Creative
You can stop here if you want, and just use this minimalistic layout to record your assignments. If you want to add art, though, a great way to make simple pages look good is to pick a theme of doodles and add one to the lower corners of each “day.” I also like to add some around the corners of the page where there’s more room. Again, these can be as simple or elaborate as you want, and Google is a great resource for step-by-step instructions. Flowers and other plant doodles are a great place to start.

You can have fun with the full month pages, too! I made the letters and drawings on this page by googling “Calligraphy font” and “snowflake doodles,” and copying the pictures. Feel free to fill up some post-its with practice sketches beforehand!

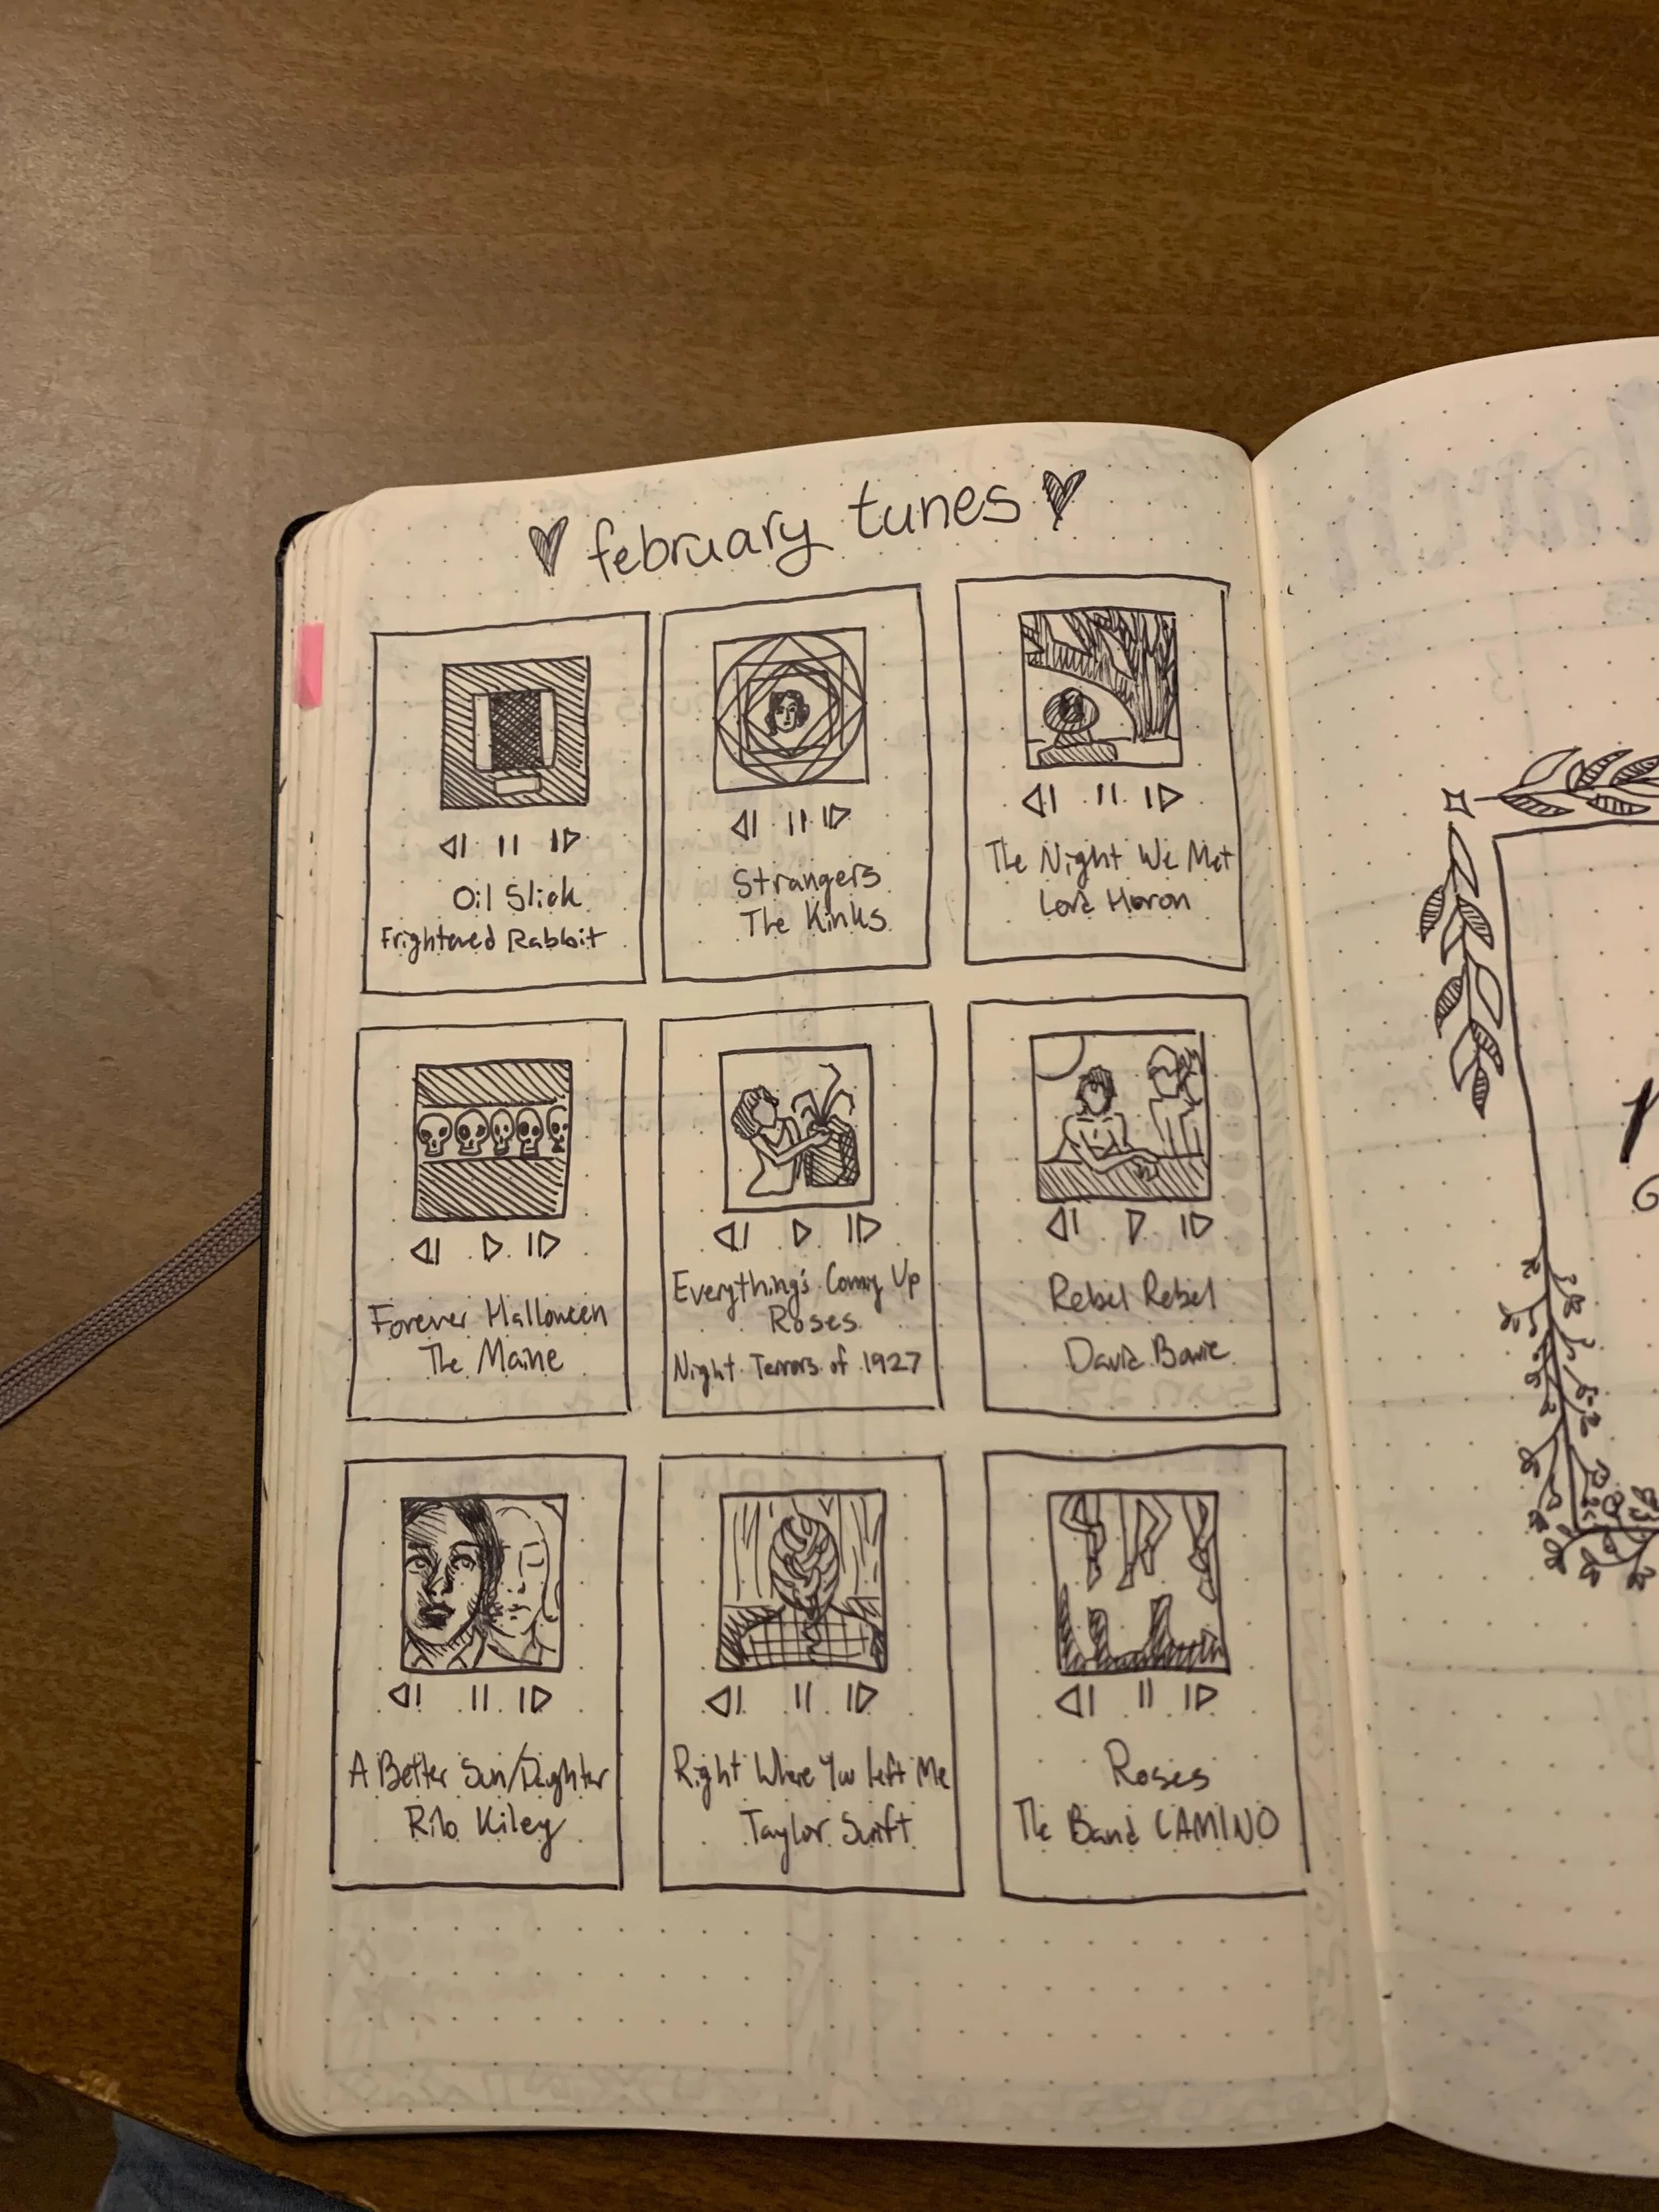
Trackers are a fun bonus to drawing your own journal as well, and they can take any form. I like to record which songs were my favorites in a given month, but you can also record your habits, such as exercise, or keep track of headaches, period symptoms and other medical issues.
Don’t feel like these are the only layout options by any means; they’re just the ones I’ve found most helpful in my own experience. I highly recommend utilizing Pinterest, Instagram and Google to find inspiration for different layouts and doodle ideas, but remember that a plain spread you’ll actually use is always better than an elaborate one that will only ever be photographed. There’s no shame in keeping it simple—personally, I find adding color and collages to be too time-intensive to do regularly, so I keep my pages ink-only. As you practice, you’ll find the patterns that work best for you, which is part of the fun of doing it in the first place!
Sources:
Russel, A. (2019, Sep 7). Can Bullet Journaling Save You? The New Yorker.